

1. Inviting Team Members (User Management)
Collaborators are introduced to your tenant boundary via a secure, rate-limited Invitation System rather than public signups. This ensures that only authorized developers, security auditors, or billing managers can access your resources.How it Works:
- Navigate to the User Management screen.
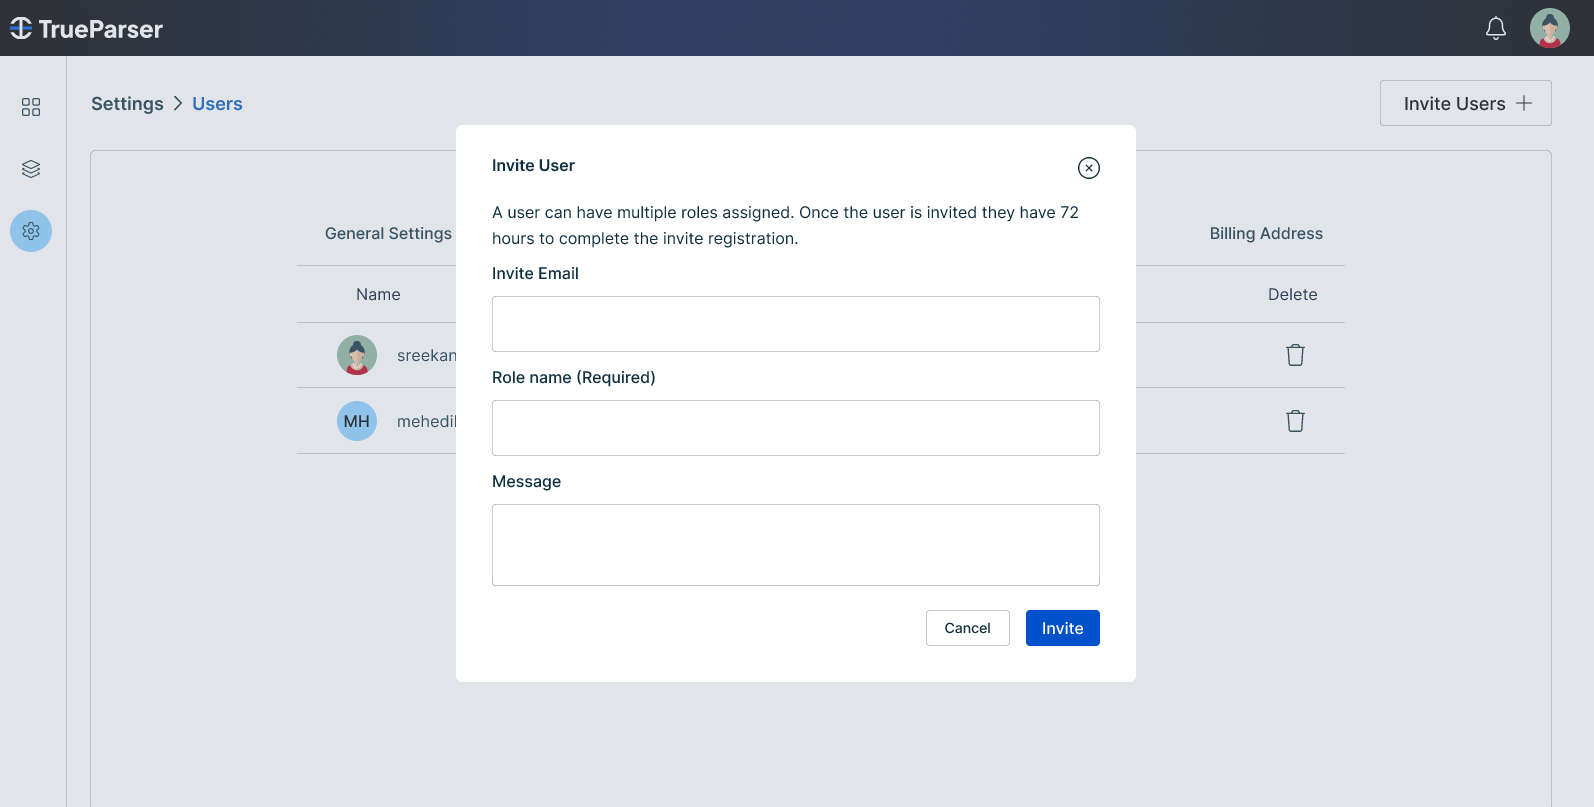
- Click Invite User to launch the invite dialog.
- Specify the recipient’s Email Address and their initial role (e.g., standard
Adminor a custom role you’ve created). - The control plane validates that no user already exists with that email in your tenant, generates a unique, cryptographically secure invitation token, and queues a welcome email.
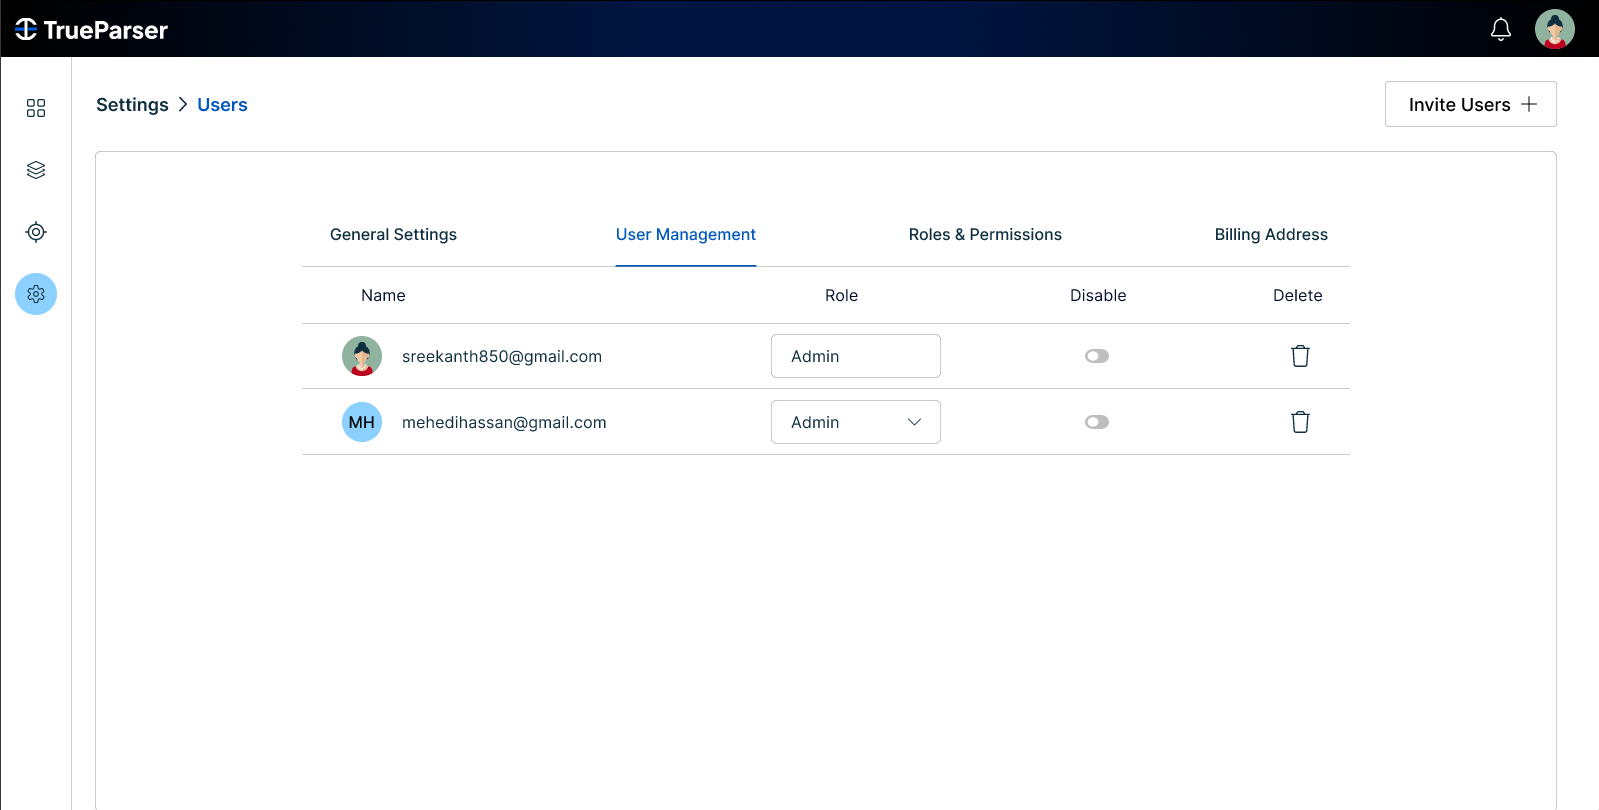
Tenant Users Directory
Team Invitation Dialog
Security Note: Setting a user’s email as confirmed occurs automatically upon accepting the invitation. This is because email ownership is verified by the unique, single-use token sent directly to the invitee’s inbox.
2. Understanding the Invitation Lifecycle
Invitations are stateful and governed by precise business rules to prevent stale tokens or unauthorized access.3. Defining Custom Roles
TrueParser is built for enterprise operations and doesn’t lock you into a single broad “Admin” permission set. To support compliance frameworks (like SOC2 or ISO 27001), you can define custom roles that precisely fit your team’s responsibilities.- Navigate to the Roles tab under User Management.
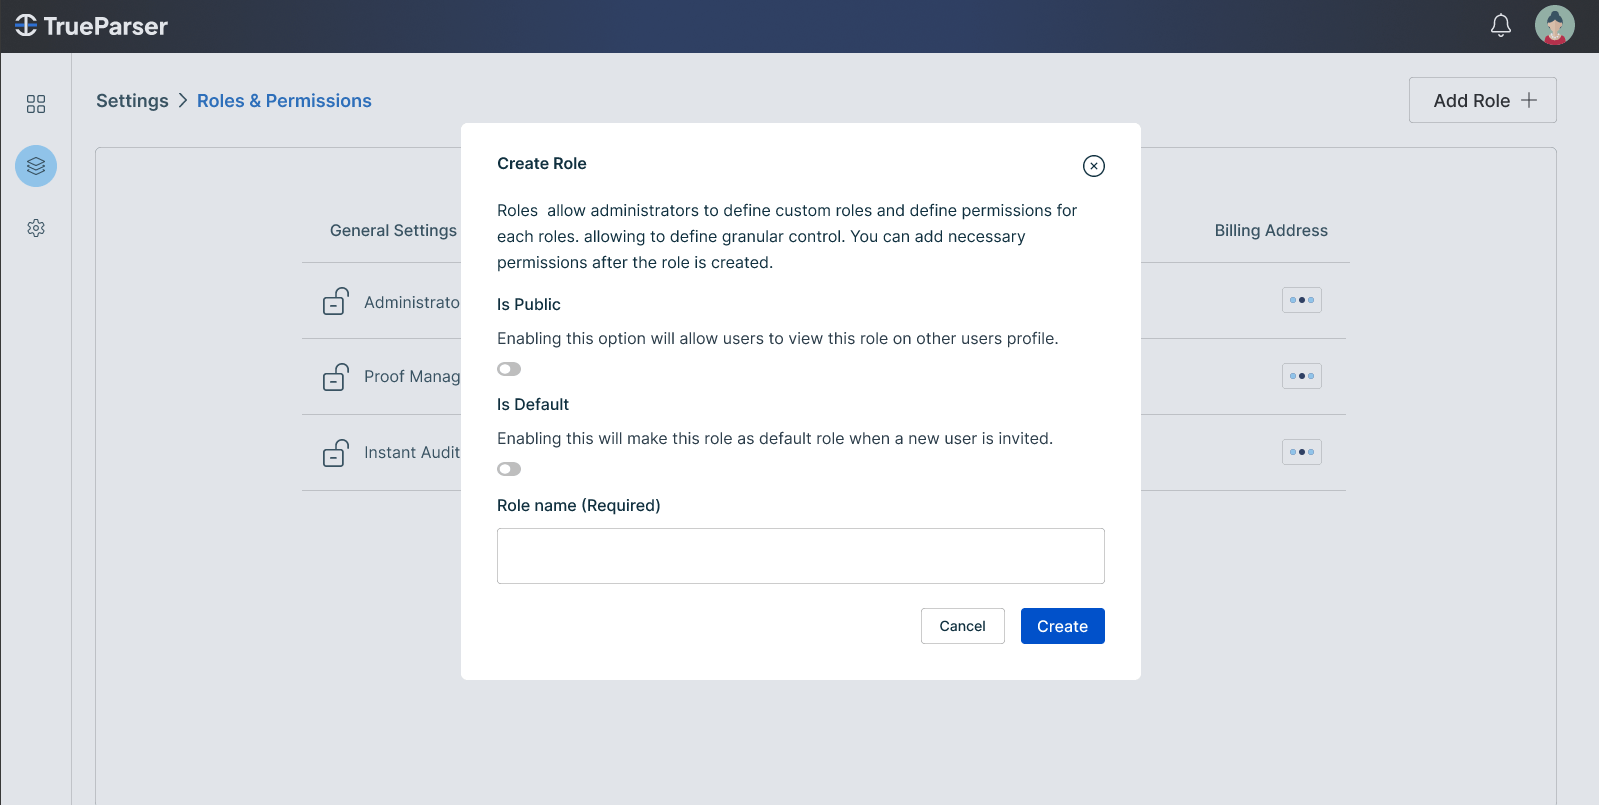
- Click Create Role and enter a unique, clear name (e.g.,
Developer,BillingManager,SecOps,Auditor). - You can set a specific role as the Default Role, causing new team members to automatically receive it upon onboarding.
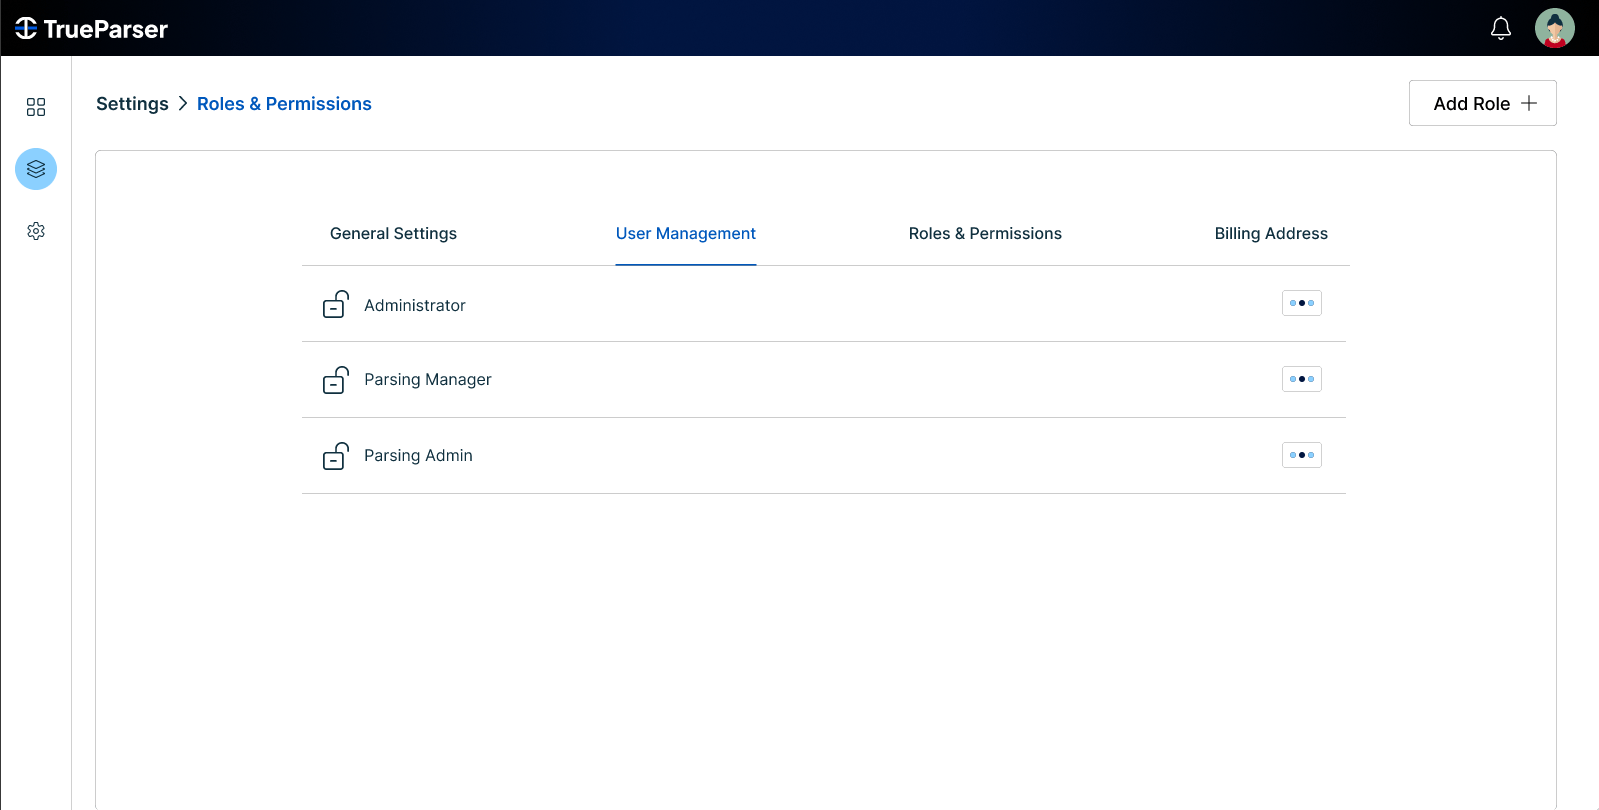
Active Organization Roles
Create Custom Role
4. Fine-Grained Permission Mapping
Every custom role can be configured with highly granular access controls. Clicking the Permissions action on any role loads the TrueParser Permission Matrix, allowing you to toggle feature sets across the UI and API layers.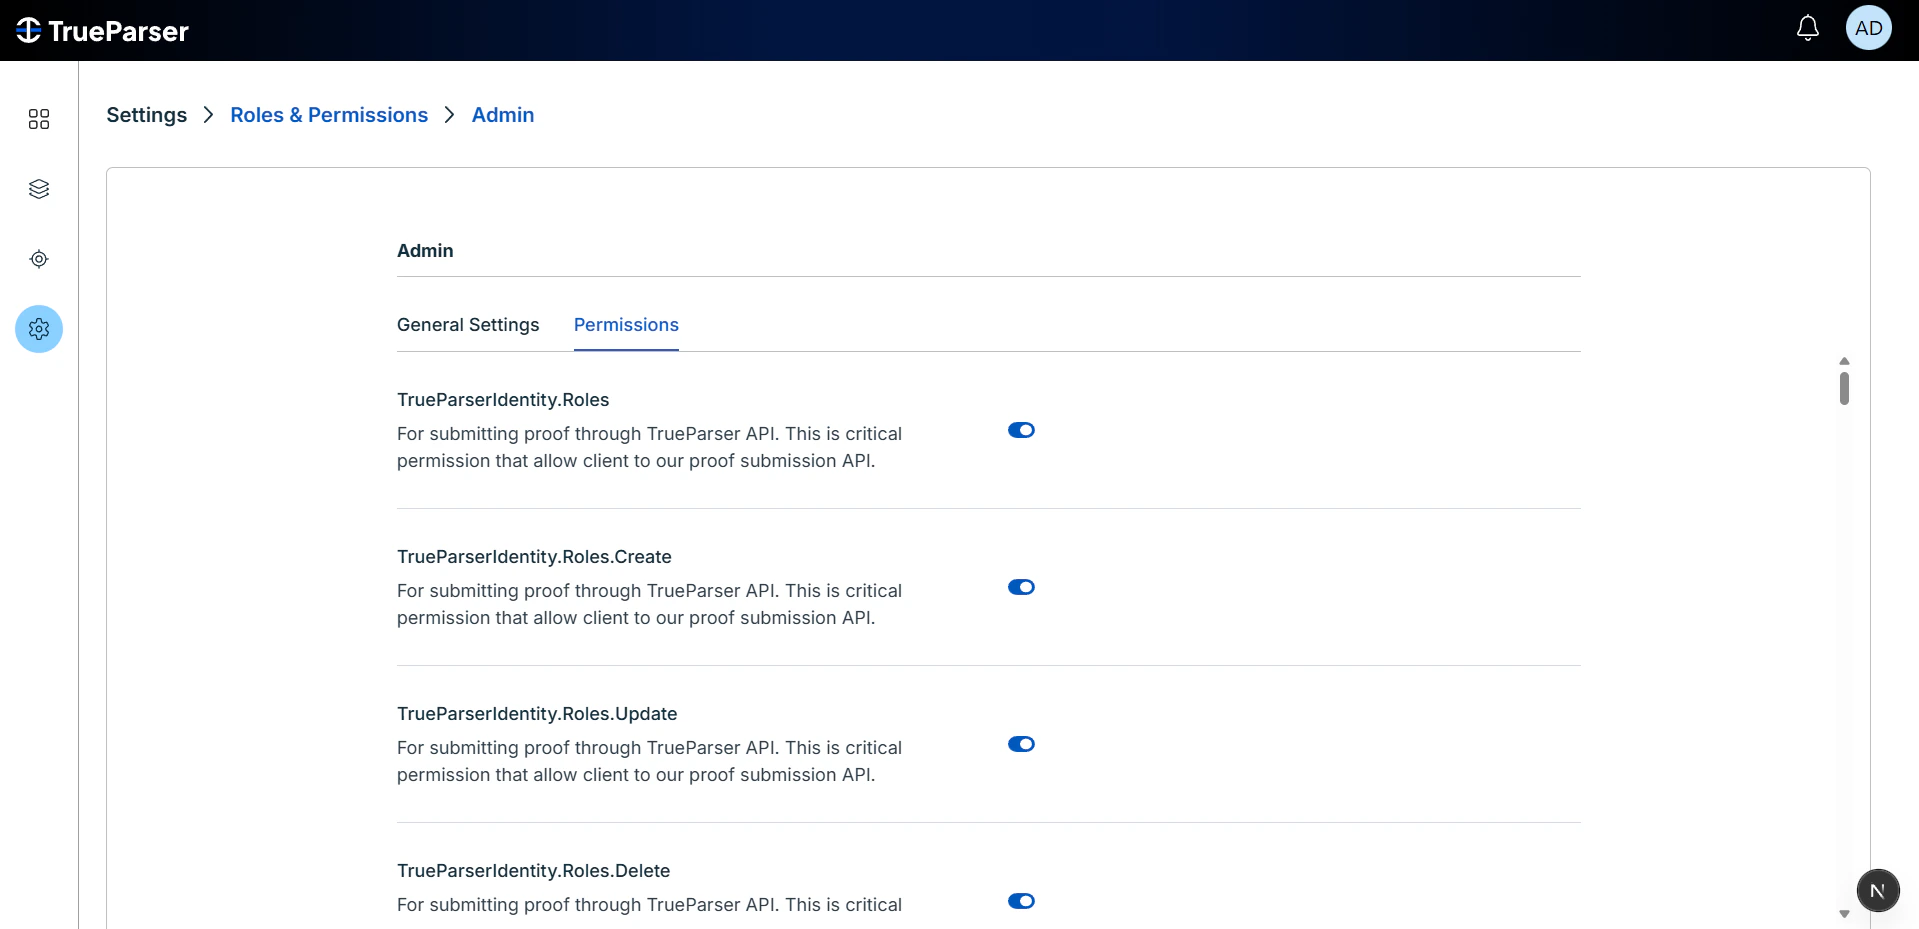
Core Permission Spheres Reference:
Use the accordion below to understand exactly what access each permission sphere controls:Application Management (M2M Credentials)
Application Management (M2M Credentials)
ControlPlane.ApplicationManagement.View: Read-only access to client IDs, configurations, and assigned plans.ControlPlane.ApplicationManagement.Create/Edit: Register new confidential backend clients (Apps), modify redirects, or update allowed domains.ControlPlane.ApplicationManagement.Delete: Remove applications. Immediate invalidation of their issued secrets.
User and Team Administration
User and Team Administration
ControlPlane.UserInvitations.Create: Invite new members and queue invitation emails.ControlPlane.UserInvitations.View: View pending invites and acceptance logs.ControlPlane.UserInvitations.Delete: Revoke and cancel pending invitation tokens.
Billing and Plan Assignment
Billing and Plan Assignment
ControlPlane.Billing.Manage: Access billing address setup, subscription status, plan upgrades, and payment checkout portals.ControlPlane.Plans.View: Browse available plan quotas and monthly limits.
Asymmetric Keys & Security Operations
Asymmetric Keys & Security Operations
ControlPlane.SigningKeys.Rotate: Critical permission allowing manual rotation of the tenant’s asymmetric JWT signing keys.
5. Role-Based Access Control (RBAC) in Practice
Here are three common enterprise role configurations you can set up on your dashboard:The Developer Role
- Purpose: Register backend machine identities and test connections.
- Recommended Permissions:
ApplicationManagement.View/Create/EditPlans.ViewApplicationS3Configs.Create/Edit(to link developer buckets)
The SecOps Role
- Purpose: Manage system health, liveness parameters, and credentials.
- Recommended Permissions:
ApplicationManagement.ViewSigningKeys.Rotate(to manage key lifecycle)SystemHealth.View
The Billing Manager Role
- Purpose: Update payment methods, addresses, and upgrade quotas.
- Recommended Permissions:
Billing.ManagePlans.View
6. Assigning Roles and Enforcing Rules
Once a user accepts their invitation, their profile is marked as active. To update their permissions:- Navigate to the Users directory.
- Click Edit User next to the target profile.
- Check or uncheck the custom roles from the directory (multiple roles are allowed).
- Click Save.
403 Forbidden response.