> ## Documentation Index
> Fetch the complete documentation index at: https://docs.trueparser.com/llms.txt
> Use this file to discover all available pages before exploring further.

# Users and Roles

> An in-depth guide to team collaboration, custom role definitions, fine-grained permission mapping, and invitation lifecycle security.

TrueParser implements a strict **zero-trust, multi-tenant architectural boundary**. All user profiles, role definitions, and permission configurations are strictly isolated within your organization's specific database shard.

When your tenant is first activated, it is provisioned with a single default **Admin** account. This guide covers how to safely scale your development team, configure custom security roles, and enforce least-privilege access using our granular permission matrix.

***

## 1. Inviting Team Members (User Management)

Collaborators are introduced to your tenant boundary via a secure, rate-limited **Invitation System** rather than public signups. This ensures that only authorized developers, security auditors, or billing managers can access your resources.

### How it Works:

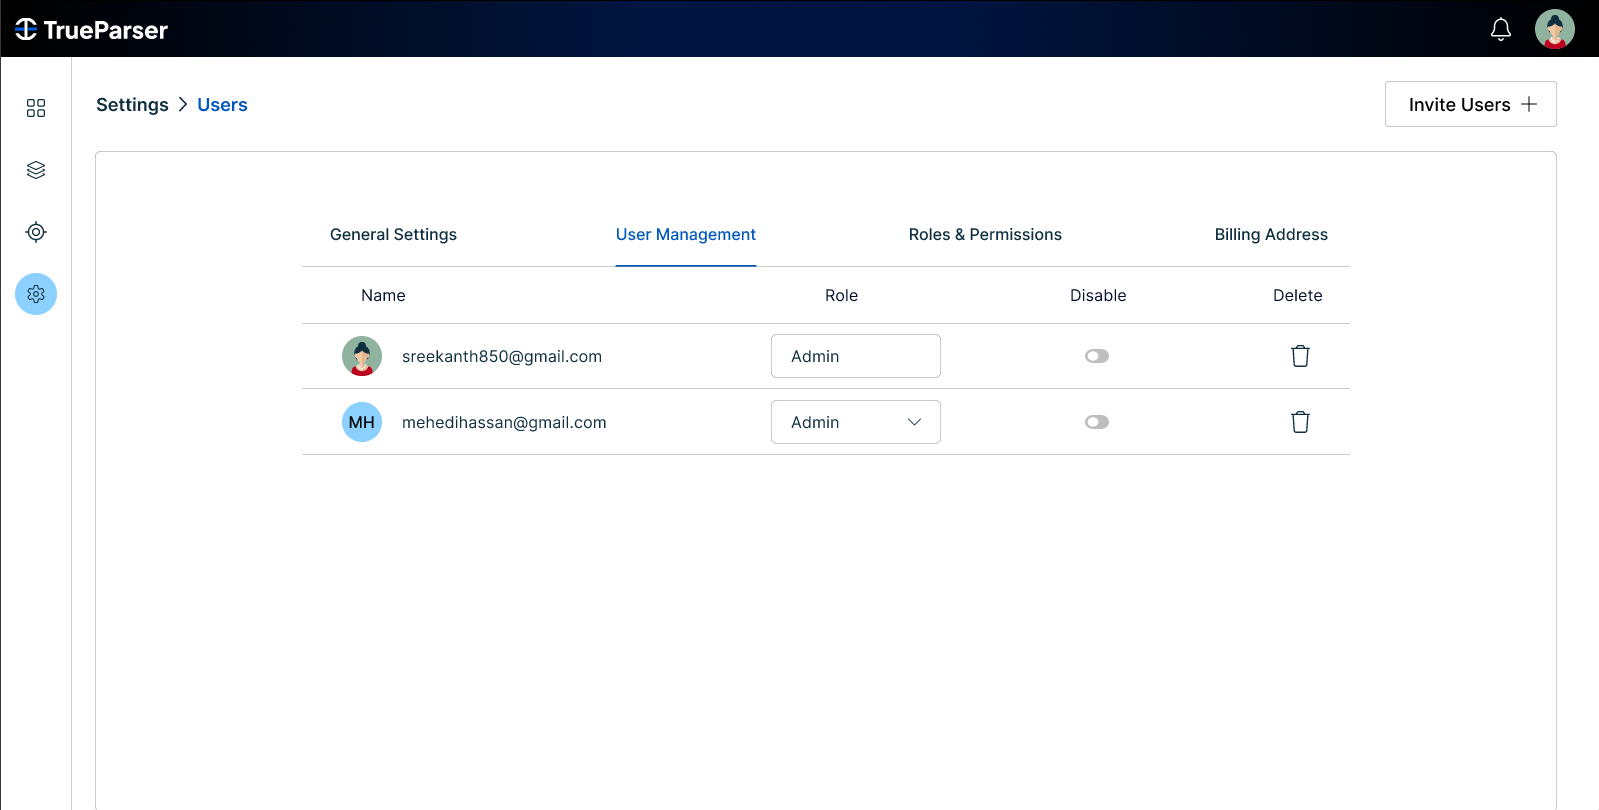
1. Navigate to the **User Management** screen.
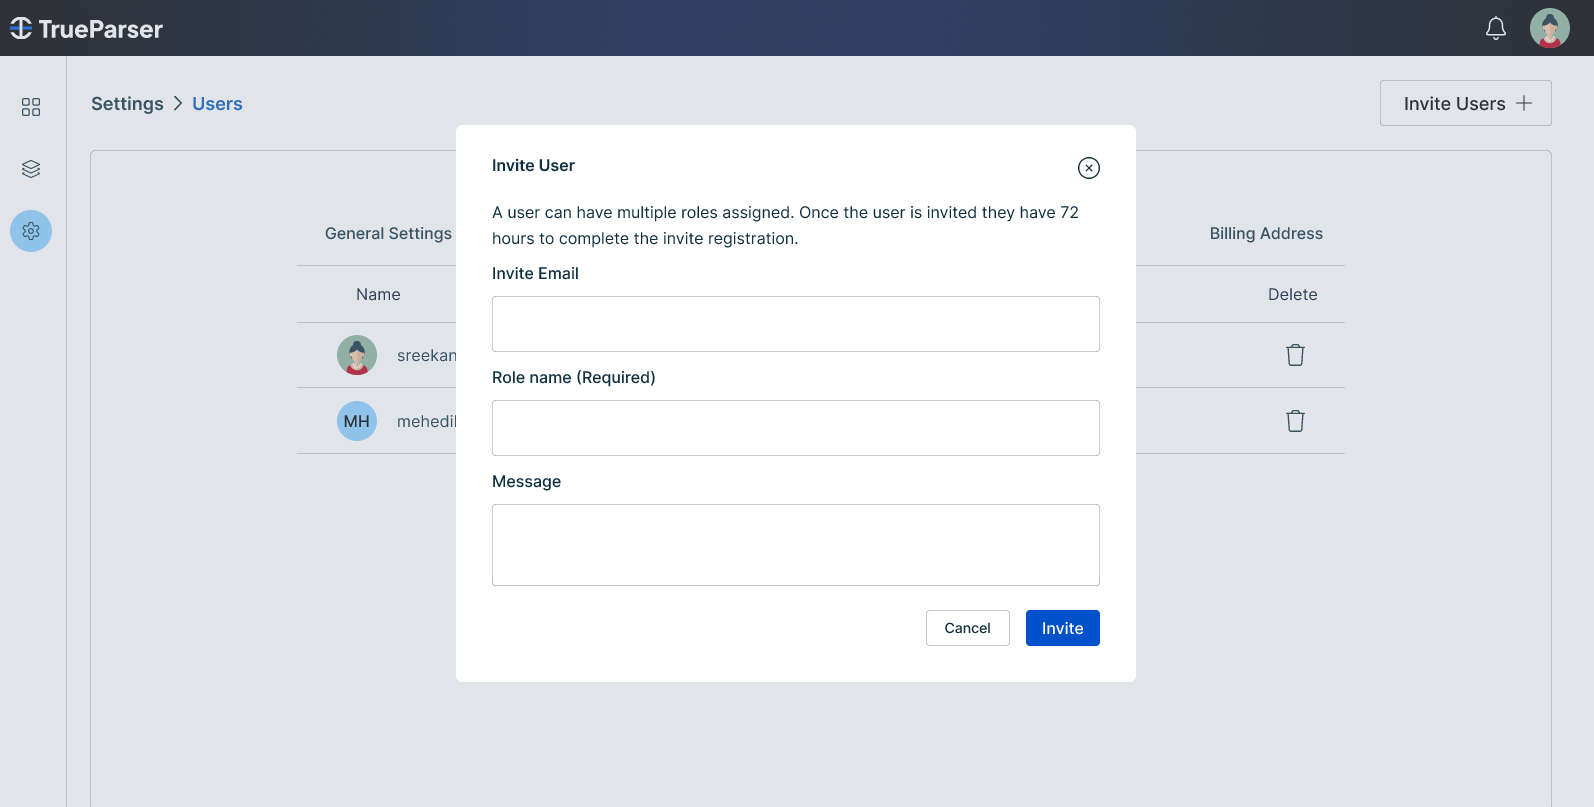
2. Click **Invite User** to launch the invite dialog.
3. Specify the recipient's **Email Address** and their initial role (e.g., standard `Admin` or a custom role you've created).
4. The control plane validates that no user already exists with that email in your tenant, generates a unique, cryptographically secure invitation token, and queues a welcome email.

<div className="grid grid-cols-2 gap-4">
  <div>
    <p className="font-semibold text-center text-sm mb-2">Tenant Users Directory</p>

    <img src="https://mintcdn.com/trueparser/OOOEclzoLnjkmCWb/images/users-and-roles/users.png?fit=max&auto=format&n=OOOEclzoLnjkmCWb&q=85&s=d1a0a934f5148b4fe072fe579aa6dc45" alt="Users List Screen" width="1599" height="810" data-path="images/users-and-roles/users.png" />
  </div>

  <div>
    <p className="font-semibold text-center text-sm mb-2">Team Invitation Dialog</p>

    <img src="https://mintcdn.com/trueparser/OOOEclzoLnjkmCWb/images/users-and-roles/invite-user.png?fit=max&auto=format&n=OOOEclzoLnjkmCWb&q=85&s=af8586aa114b963037c4340f74192e16" alt="Invite User Modal" width="1594" height="807" data-path="images/users-and-roles/invite-user.png" />
  </div>
</div>

<Info>
  **Security Note**: Setting a user's email as confirmed occurs automatically upon accepting the invitation. This is because email ownership is verified by the unique, single-use token sent directly to the invitee's inbox.
</Info>

***

## 2. Understanding the Invitation Lifecycle

Invitations are stateful and governed by precise business rules to prevent stale tokens or unauthorized access.

| Status          | Description                                                   | Actionable Rules / Transition                                                 |
| :-------------- | :------------------------------------------------------------ | :---------------------------------------------------------------------------- |
| **`Pending`**   | The invitation is created and the email is queued.            | The token is active. The invitation expires automatically after **72 hours**. |
| **`Accepted`**  | The user clicked the link and completed their password setup. | The token is permanently invalidated. The user is activated.                  |
| **`Expired`**   | The 72-hour validation window passed before acceptance.       | Sign-in is blocked. Admins can click **Resend** to renew the token.           |
| **`Cancelled`** | An admin revoked the invitation before it was accepted.       | The token is immediately voided. Any click on the link is rejected.           |
| **`Failed`**    | The mail server encountered a permanent delivery failure.     | The invite is flagged for review. Admins can verify the email and retry.      |

<Warning>
  Outstanding invitations can be cancelled at any time by an administrator. Once cancelled, any attempt to use the invitation token is rejected by the backend as invalid.
</Warning>

***

## 3. Defining Custom Roles

TrueParser is built for enterprise operations and doesn't lock you into a single broad "Admin" permission set. To support compliance frameworks (like SOC2 or ISO 27001), you can define custom roles that precisely fit your team's responsibilities.

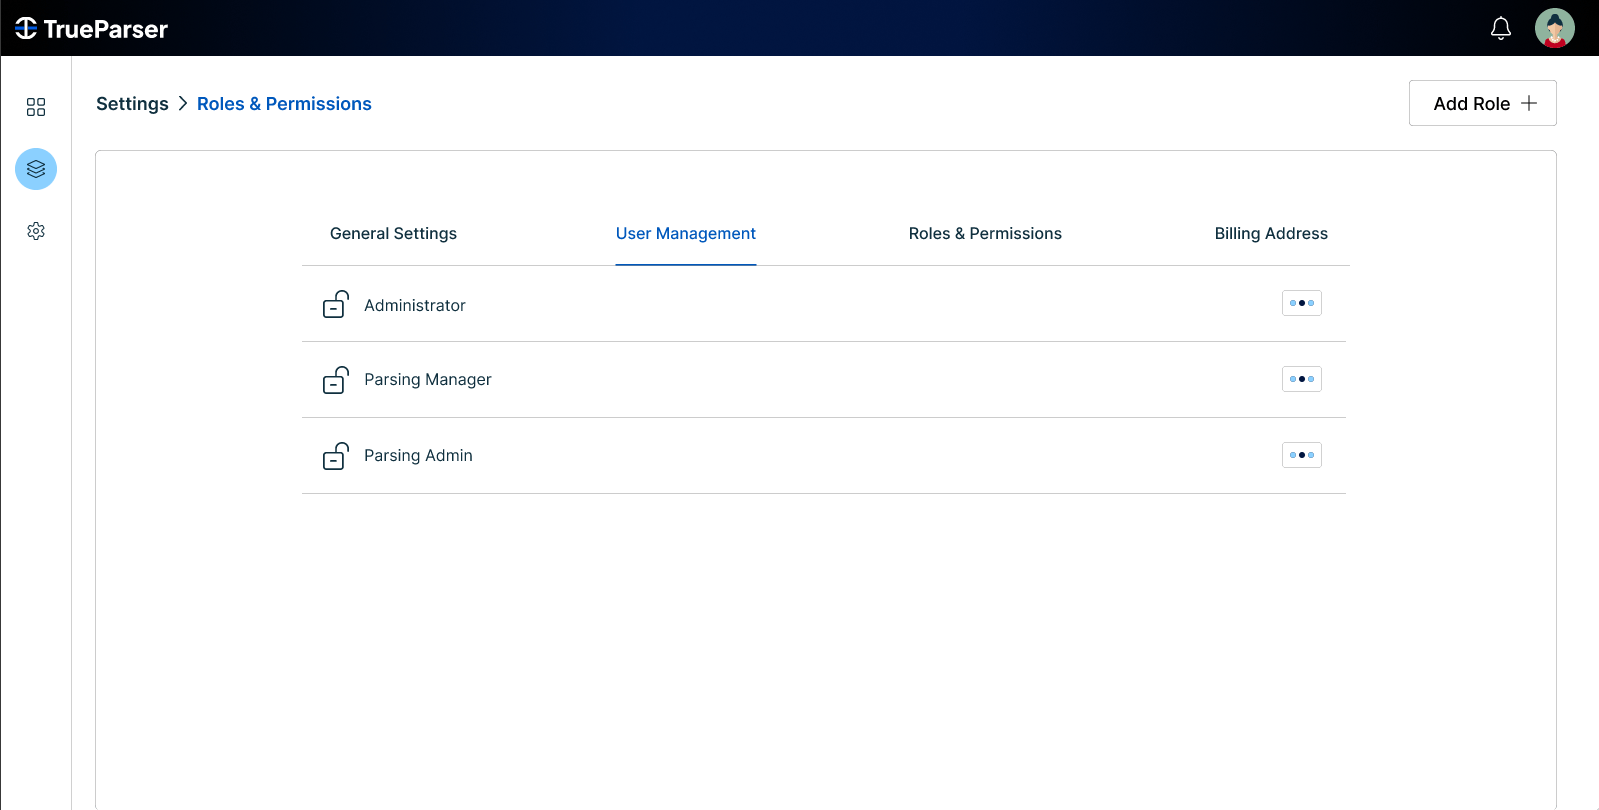
* Navigate to the **Roles** tab under User Management.
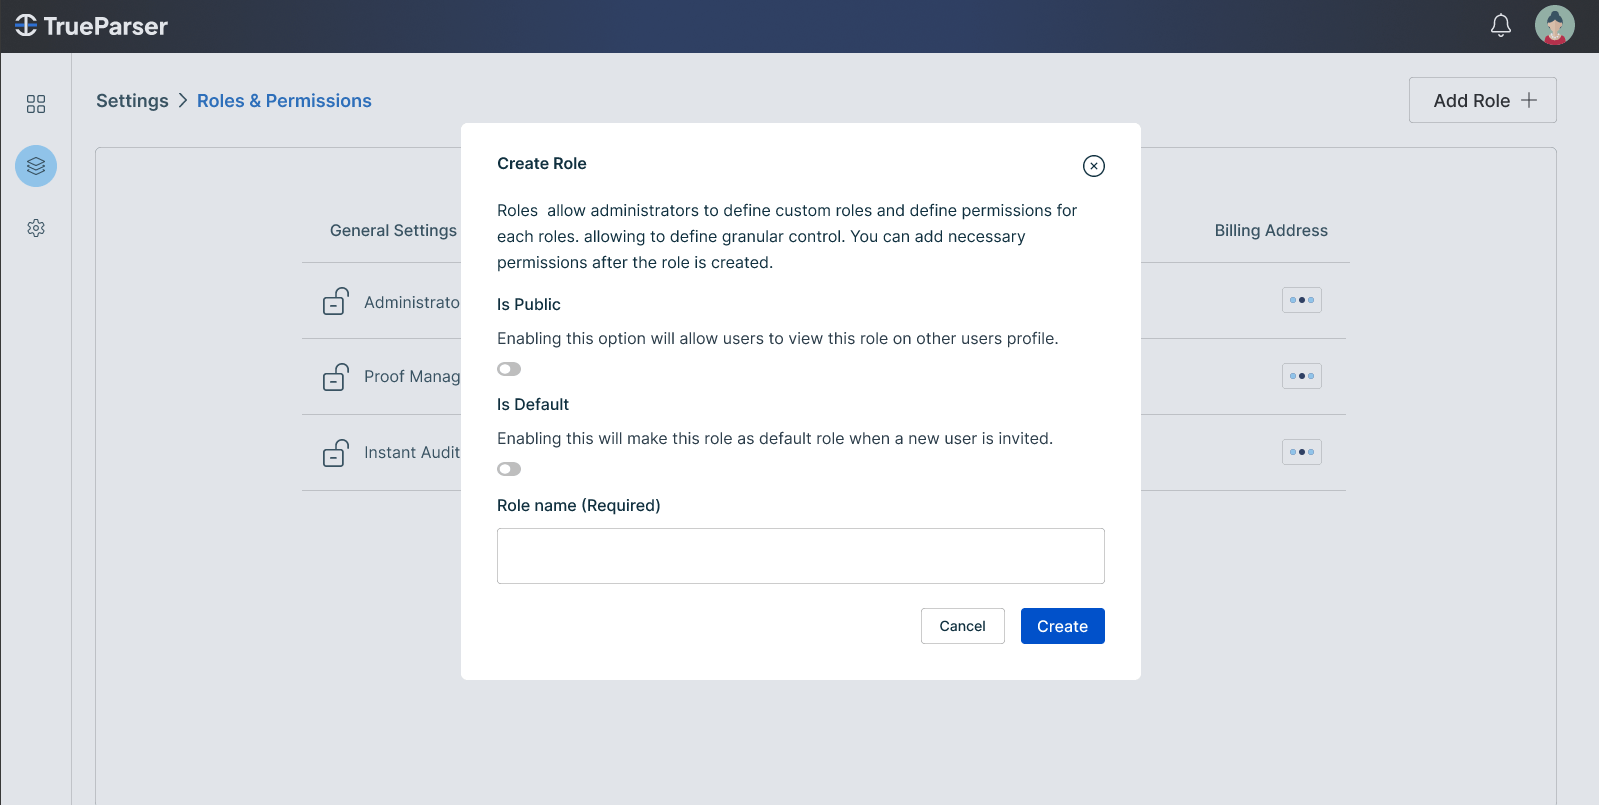
* Click **Create Role** and enter a unique, clear name (e.g., `Developer`, `BillingManager`, `SecOps`, `Auditor`).
* You can set a specific role as the **Default Role**, causing new team members to automatically receive it upon onboarding.

<div className="grid grid-cols-2 gap-4">
  <div>
    <p className="font-semibold text-center text-sm mb-2">Active Organization Roles</p>

    <img src="https://mintcdn.com/trueparser/OOOEclzoLnjkmCWb/images/users-and-roles/roles.png?fit=max&auto=format&n=OOOEclzoLnjkmCWb&q=85&s=62d9b8451e685c0ad0e6c734c9edc297" alt="Roles List Screen" width="1599" height="810" data-path="images/users-and-roles/roles.png" />
  </div>

  <div>
    <p className="font-semibold text-center text-sm mb-2">Create Custom Role</p>

    <img src="https://mintcdn.com/trueparser/OOOEclzoLnjkmCWb/images/users-and-roles/create-role.png?fit=max&auto=format&n=OOOEclzoLnjkmCWb&q=85&s=8016a5be81cc7c439e6b31a62ebafe03" alt="Create Role Modal" width="1599" height="805" data-path="images/users-and-roles/create-role.png" />
  </div>
</div>

***

## 4. Fine-Grained Permission Mapping

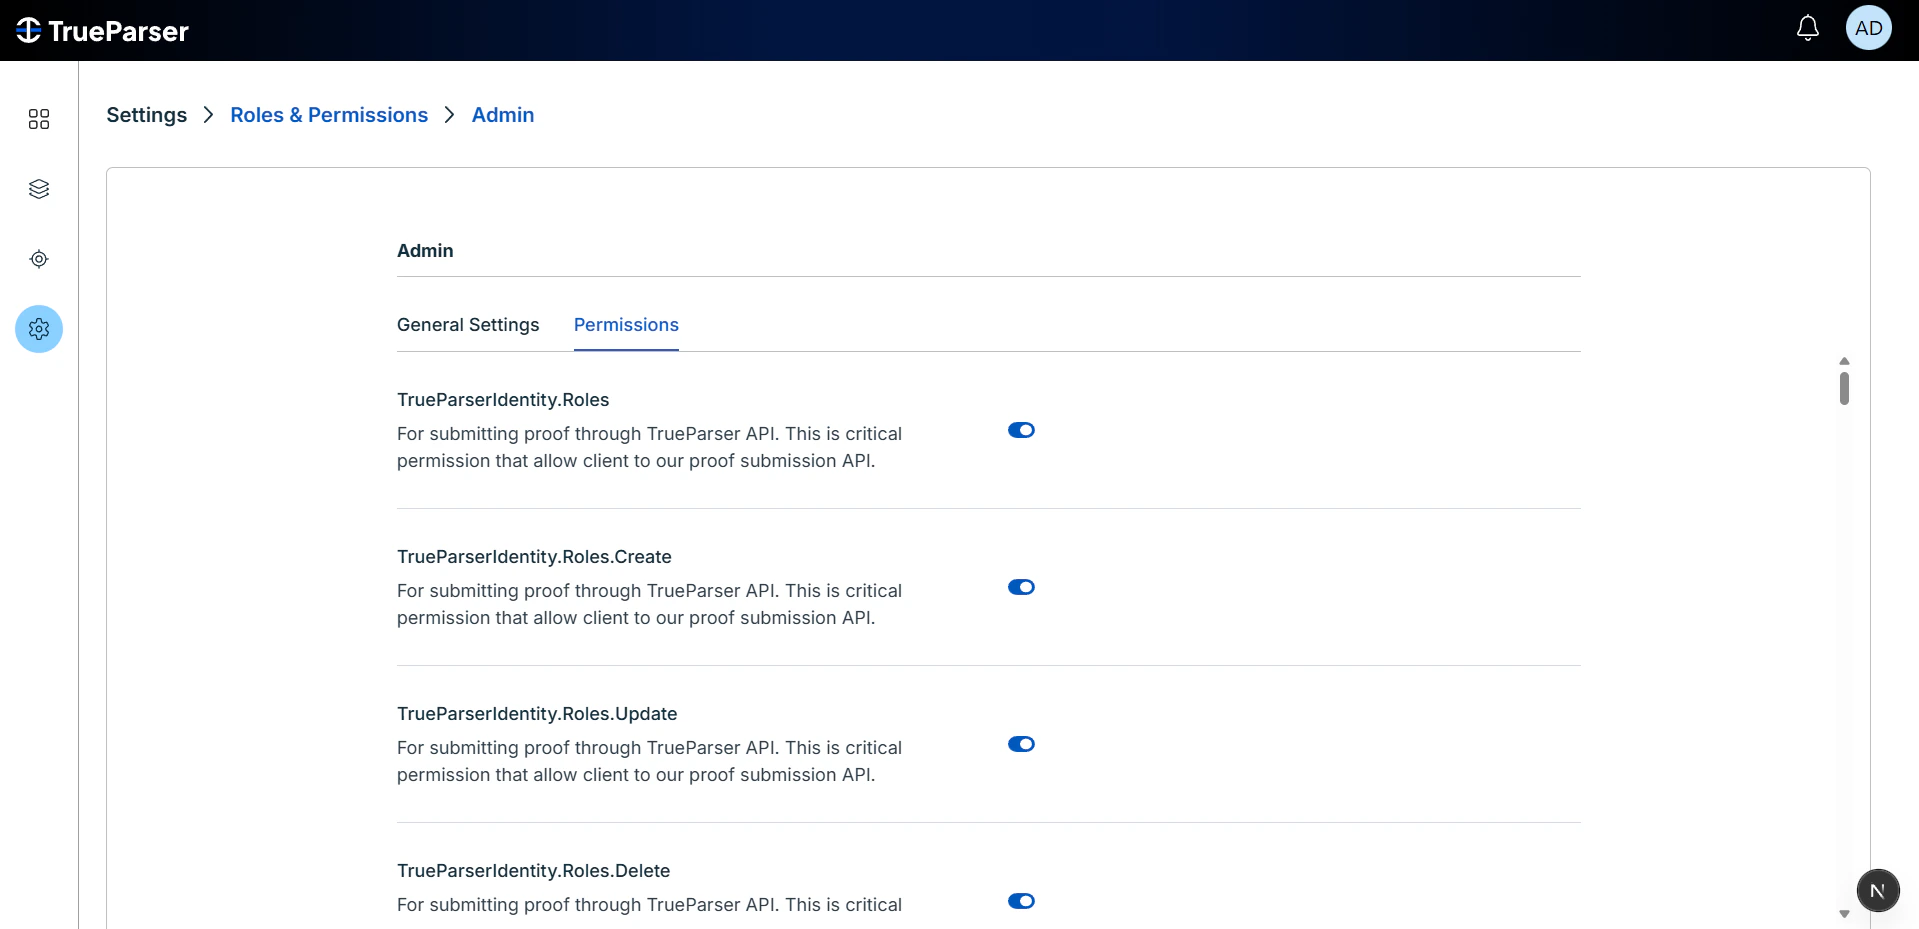
Every custom role can be configured with highly granular access controls. Clicking the **Permissions** action on any role loads the **TrueParser Permission Matrix**, allowing you to toggle feature sets across the UI and API layers.

<img src="https://mintcdn.com/trueparser/GcBbqBGtDv8ls5GQ/images/users-and-roles/permissions.png?fit=max&auto=format&n=GcBbqBGtDv8ls5GQ&q=85&s=72e84b817adbd93123112fe3d6dcd566" alt="Fine-Grained Permission Selector Matrix" width="1919" height="929" data-path="images/users-and-roles/permissions.png" />

### Core Permission Spheres Reference:

Use the accordion below to understand exactly what access each permission sphere controls:

<AccordionGroup>
  <Accordion title="Application Management (M2M Credentials)">
    * **`ControlPlane.ApplicationManagement.View`**: Read-only access to client IDs, configurations, and assigned plans.
    * **`ControlPlane.ApplicationManagement.Create` / `Edit`**: Register new confidential backend clients (Apps), modify redirects, or update allowed domains.
    * **`ControlPlane.ApplicationManagement.Delete`**: Remove applications. Immediate invalidation of their issued secrets.
  </Accordion>

  <Accordion title="User and Team Administration">
    * **`ControlPlane.UserInvitations.Create`**: Invite new members and queue invitation emails.
    * **`ControlPlane.UserInvitations.View`**: View pending invites and acceptance logs.
    * **`ControlPlane.UserInvitations.Delete`**: Revoke and cancel pending invitation tokens.
  </Accordion>

  <Accordion title="Billing and Plan Assignment">
    * **`ControlPlane.Billing.Manage`**: Access billing address setup, subscription status, plan upgrades, and payment checkout portals.
    * **`ControlPlane.Plans.View`**: Browse available plan quotas and monthly limits.
  </Accordion>

  <Accordion title="Asymmetric Keys & Security Operations">
    * **`ControlPlane.SigningKeys.Rotate`**: Critical permission allowing manual rotation of the tenant's asymmetric JWT signing keys.
  </Accordion>
</AccordionGroup>

<Warning>
  **Key Rotation Warning**: The `SigningKeys.Rotate` permission should only be granted to **SecOps** or **Lead Administrators**. Rotating a signing key will require data plane clients to refresh their cached JWKS keys immediately.
</Warning>

***

## 5. Role-Based Access Control (RBAC) in Practice

Here are three common enterprise role configurations you can set up on your dashboard:

### The Developer Role

* **Purpose**: Register backend machine identities and test connections.
* **Recommended Permissions**:
  * `ApplicationManagement.View` / `Create` / `Edit`
  * `Plans.View`
  * `ApplicationS3Configs.Create` / `Edit` (to link developer buckets)

### The SecOps Role

* **Purpose**: Manage system health, liveness parameters, and credentials.
* **Recommended Permissions**:
  * `ApplicationManagement.View`
  * `SigningKeys.Rotate` (to manage key lifecycle)
  * `SystemHealth.View`

### The Billing Manager Role

* **Purpose**: Update payment methods, addresses, and upgrade quotas.
* **Recommended Permissions**:
  * `Billing.Manage`
  * `Plans.View`

***

## 6. Assigning Roles and Enforcing Rules

Once a user accepts their invitation, their profile is marked as active. To update their permissions:

1. Navigate to the **Users** directory.
2. Click **Edit User** next to the target profile.
3. Check or uncheck the custom roles from the directory (multiple roles are allowed).
4. Click **Save**.

The backend immediately rebuilds the user's security claims. If a user attempts to call an API or perform an action on the dashboard for which they lack permissions, the control plane blocks the request at the gateway level and returns a standard `403 Forbidden` response.

***

## Related Documentation

* [Developer Onboarding Sequence](/dashboard/onboarding)
* [Authentication & Token Model](/dashboard/authentication)
* [App Setup & Configuration](/dashboard/app-setup)